It is time at last to install the SBus PrestoServe card into the SPARCclassic workstation. One might suspect that this would be straightforward, but, as usual when retrocomputing, there is a wrinkle.
Ears
In spite of SBus itself being fully-specified, including the size/shape of expansion boards, and the size/shape/layout/pinout of the bus connector, the form of the backplate was never actually formally *specified* – instead example backplate templates were published, for the SPARCstation-1 (the first SBus-based system).
That same backplate shape was used on the SPARCstation-1+, SPARCstation-2, and contemporary models. This had a pair of sticking-up lugs (“ears”) on the top of the plate, which locked into matching holes in the chassis.
However, the (later) SPARCserver-600 series systems, SPARCstation-10, SPARCstation-20, SPARCserver-1000 and SPARCcenter-2000 used a slightly different SBus backplate-retaining mechanism: mid-vertical left-/right-hand side screw holes that were used to clamp a couple of small outer plates to sandwich the sides of the system chassis’ rectangular backplate-hole.
Thus the very earliest SBus cards from Sun and other manufacturers (Antares, et al) would physically fit in early SPARCstations, they would not physically fit into late-era SPARCstations or SPARC servers.
To try and deal with this problem, Sun (and other manufacturers) changed their SBus cards from 1991 onwards, using a backplate that could be fitted into either retaining mechanism, by having both the mid-vertical left/right screw-holes needed for the latter systems, and a thin screw-on strip to provide the ears for the others.
SBus ears
As you may have guessed, the SPARCclassic uses the earlier retaining mechanism, but the PrestoServe card I have is missing the screw-on ears.
Transplant
Fortunately, the PrestoServe card does have the secondary screw-holes for the ear strip, and I have other SBus cards to hand, so a simple transplant did the trick:
donor/recipient
surgery
sorted!
Sorted!
Hardware Installation
Now that we have ears, and after removing the spring-loaded chassis slot-blanking-plate, installing the card into the SPARCclassic was as quick and simple as one would expect:
Then I enabled the card’s on-board battery by sliding the disable/enable switch on the card. The battery must be enabled for the card to function (and be recognised by Solaris).
disabled
enabled
The next job was to see if the system firmware could see the card:
Bingo! I now know I have a PrestoServe card that works at least from a hardware perspective.
Software Unavailability
As noted in episode 5, the original need for PrestoServe (NFS write-acceleration) had largely passed by 1998 due to the introduction of NFSv3 in 1995. Solaris 2.5 was the last ever release of Solaris to include the needed device-driver and command-line utility, and due to changes in Solaris 2.6, the software on the Solaris 2.5 CDROM is not quite compatible with Solaris 2.6.
Additionally, the Sun standalone (“unbundled”) PrestoServe software package was completely discontinued by the time Solaris 7 came around in Autumn 1998. Of course, in spite of asking around on the usual mailing-lists and fora, the original Sun PrestoServe CDROM for Solaris cannot be found anywhere, not even in collectors attics.
So, standing here in 2021, how are we going to get the PrestoServe device software for Solaris 2.6?
A Possible Indirect Route, via SunSolve 1998
As it happens, the last Sun patch for the last version of PrestoServe (2.4.2), patch 103043-08, is on the September 1998 SunSolve patch collection we encountered in episode 7.
Is it possible that patch 103043-08 contains enough of the software to be able to get the ball rolling? On inspection, the patch contains the binary loadable kernel-driver file, the binary executable command-line utility, and the manpage for the latter.
Unfortunately, that is not in itself sufficient: there is a lot of additional complex rigging needed to be able to load and activate the device-driver in the kernel: scripts to add the necessary inscrutable entries into /etc/devlink.tab, invoke the Solaris add_drv utility with *just* the right inscrutable hardware-specific parameters, and generally muck about with various low-level system configuration files.
Fortunately, all those scripts and invocations are plain-text, so it might be possible to work out what is needed and construct them myself… this involves digging into the Solaris/SVR4 device-driver development manuals and some experimentation. That’s an adventure for next time…
Armed with a SPARC workstation running a virginal Solaris 2.6 5/98, the next step is to apply all the fixes and updates for Solaris 2.6. Given that it has been out of support for almost two decades, this requires I refer to some old sets of CDROMs that I saved from way back: SunSolve.
SunSolve 1990-1997
From the early 1990’s, Sun Microsystems provided, to customers with hardware support contracts, a set of software-and-hardware support resources as a branded pack of CDROMs, called “SunSolve”. A new edition was released and delivered by snail-mail several times a year. You have to remember that this was before the World-Wide-Web became mainstream.
The early editions of SunSolve contained several different sets of resource:
Patches – installable software fixes and updates for operating systems (SunOS 4.x, Solaris 2.x, Interactive UNIX, etc, etc) and for unbundled Sun software products, and a few selected firmware updates for systems and peripheral hardware.
Patch Descriptions – a searchable database of patch descriptions, each listing all the individual bugs fixed.
Bug Reports – a searchable database of numbered bug-reports (including hardware bugs!), each containing full descriptions of the effected systems and software, and a list of the patches that address them (where such were available); many also contained documented workarounds and diagnostic steps to verify or otherwise the existence of the bug on customer systems.
Symptoms and Resolutions Database (“SRDB”) – a searchable database of Sun knowledgebase-style articles relating to use of Sun software and hardware products.
FAQs – a searchable set of Sun or Sun-related frequently-asked-questions documents, with answers.
Technical White Papers – a searchable set of (at least vaguely Sun-related) technical papers and articles. Such things as a technical backgrounder on the design and history of NFS, an overview of the SCSI command-set, a paper analysing the structural differences between multi-processing in SunOS 4.x versus Solaris 2.x/SVR4 and the effects on system and application performance, and so on, and so on, and so on: thousands of wonderful general computing technical information.
Early Notifier Bulletins – a searchable set of miscellaneous bulletins (upcoming software releases, schedules for version-specific/model-specific end-of-support, alerts about discontinued products or configurations, and so on).
SunSolve 1998
By 1998, even with a set of three CDROMs, space was getting tight due to the sheer number of patches for an ever-widening set of software products and versions, so Sun then started omitting the older technical white papers, bulletins and FAQs.
By that time, SunSolve had it’s own website, sunsolve.sun.com, providing an online version of the materials on the CDROM edition, and not dependent on a hardware-support contract (which was still required to receive the periodic CDROM edition by snail-mail).
SunSolve 2000-2001
By the turn of the Millenium, the package had expanded to 4 CDROMs, 3 of which contained Sun patches, the other containing a rather cut-down set of other informational documents.
booklet
By this time, most of the ancilliary additional information documents had disappeared from the website version of SunSolve, too.
SunSolve 2001 onwards
In early 2001, SunSolve CDROM edition dropped everything except the patches themselves.
By the time 2005 came around, the patches had grown into a set of 9 CDROMs!
Significantly for this project, the mid-2005 edition of SunSolve contains the last ever release of the Solaris 2.6 “Recommended Patch Cluster”.
SunSolve, 2005
SunSolve, 2005
Solaris 2.6 Recommended Patch Cluster
The “Recommended Patch Cluster” is a gathered bundle of (only) the most important indivudual patches, with a special install script that can install the entire patch cluster in one go, rather than having to slog through each individual patch one at a time.
Even so, on a 50 MHz SPARCclassic, I expected this to take as much as 24 hours. In practice, it took 4.5 hours, quicker than expected probably due to running from and installing onto an SSD, rather than the low-end SCSI HDD that I last remembered doing this on.
So let’s see the system startup messages now, can you spot the magic code that shows this is now a fully-patched Solaris 2.6? That particular code is scorched into my long-term memory from 20 years ago, never to be forgotten :-).
ok boot
Resetting ...

SPARCclassic, No Keyboard
ROM Rev. 2.12, 64 MB memory installed, Serial #14600926.
Ethernet address 8:0:20:3c:ae:bf, Host ID: 80decade.

Initializing Memory
Boot device: /iommu/sbus/espdma/esp/sd@5,0:a   File and args:
SunOS Release 5.6 Version Generic_105181-39 [UNIX(R) System V Release 4.0]
Copyright (c) 1983-1997, Sun Microsystems, Inc.
configuring network interfaces: le0.
Hostname: sunergy
The system is coming up.  Please wait.
checking ufs filesystems
/dev/rdsk/c0t5d0s6: is clean.
/dev/rdsk/c0t5d0s4: is clean.
starting routing daemon.
starting rpc services: rpcbind keyserv done.
Setting default interface for multicast: add net 224.0.0.0: gateway sunergy
syslog service starting.
Print services started.
volume management starting.
The system is ready.

sunergy console login:
Next episode I will be instaling the PrestoServe card, and trying to get the software for it loaded. Curiously, the even older 1998 edition of SunSolve will be needed…
After preparing the SSD with an SSD-friendly Sun disk-label, and partitioning it with a PrestoServe-friendly Sun partition-table (aka “VTOC”), I’m am now ready to install Solaris 2.6 on it.
CDROM Drive
Because the SPARCclassic does not have an internal CDROM drive, or room to add one, I will use an external SCSI CDROM drive (actually a DVD-RAM drive that can read CDROMs). However, mine is extremely dirty on the outside, and I needed to clean it before assembling it all into an old-school “Sun lunchbox stack”…
dirty
clean
stack (front)
stack (rear)
tray
The Need for More Magic
Unfortunately, by default, the Solaris installer will offer to automatically repartition the drive with what it thinks is a good layout. Unfortunately, it’s idea of “good” is targeted at 1990’s-era virtual-CHS rotating-rust small-capacity HDDs (eg: the Sun 207MB, 404MB, 1GB or 1.4GB SCSI HDDs) and is utterly unsuitable for a 100GB SSD, and doubly so for one where PrestoServe is going to be deployed.
So I will have to persuade the Solaris installer to use the *existing* partitioning on the drive, by detouring into some of the lesser-used optional screens during install time, as shown below.
Installing Solaris 2.6
First step, starting from the firmware “ok” prompt, is to boot the Solaris installer from the Solaris Software CDROM, thus:
ok boot cdrom
The first few screens can be navigated in the normal manner (for a Solaris install, that is), until we get to…
1. “Select Software”
There is no point being parsimonious here, we have a huuuuuuge 100Gb capacity to play with: select “Entire Distribution” then “F2 Continue“.
2. “Select Disks”
Select the SSD (in this case, the 102392 MB is a handy clue!), then “F2 Continue“. Whilst on this screen, you can laugh-and-point at the paltry Suggested Minimum of merely 472 MB!
3. “Preserve Data?”
The installer will recognise that the drive is pre-partitioned, and asks whether you want to preserve any data that might just happen to be there. Of course, in this particular case, there isn’t and therefore we don’t. So just select “F2 Continue“.
4. “Automatically Layout File Systems?”
This is where the installer is offering to guess what disk-partitioning would be “good”. Don’t let it, instead select “F4 Manual Layout“.
5. “File System and Disk Layout”
This screen shows an empty partititioning scheme (for the selected drive) that will be presumed until overridden. Select “F4 Customize“.
6. “Customize Disk”
This screen allows manual interactive specification of the size and mount-point for each partition, but does not allow selection of partition *positioning* (eg: skipping the first cylinder, which I need to absolutely minimise unaligned writes to the SSD). Thus we need to invoke the final magic incantation now by selecting “F4 Options” here.
7. “Disc Editing Options”
Here we have the option to use the pre-existing partition table (aka VTOC) that I so-carefully constructed in the previous episode. Select both “Show Cylinder Boundaries” and “Load existing slices from VTOC label“, then select “F2 OK“.
This will provoke a warning that any interactive partition-table edits made so far will be discarded; even though there have not actually been any edits so far – so just select “F2 OK” here, too.
8. “Customize Disk” (again)
We are now back in the Customize Disk, but with our lovely custom pre-configured partition-table loaded. We need to manually fill-in the “Mount Point” entries on this screen, as per the plan from the previous episode (as shown above). Remember to leave the mount-point blank for partition/slice number 7. Then select “F2 OK“.
9. “File System and Disk Layout” (again)
Now we get a confirmation of the layout that will be applied by the Solaris installer. This is the last chance to change our mind. If it all looks as expected, select “F2 Continue“. Otherwise “F4 Customize” will take us back to step 6 where we can have another go at it.
Wrap-Up
That is all the required installer configuration high-jinks completed. The remainder of the Solaris installer screens can be navigated as per usual. The actual Solaris install on a lowly SPARCclassic can take several hours, so I left it to cook overnight. On first restart, it asked for a new “root” password. Now we have Solaris installed, let’s take a look at the usage of the filesystems from within the installed system:
sunergy console login: root
Password:
Oct 30 21:40:26 sunergy login: ROOT LOGIN /dev/console
Last login: Sat Oct 30 21:23:18 on console
Sun Microsystems Inc.   SunOS 5.6       Generic August 1997
#
# df -kl
Filesystem            kbytes    used   avail capacity  Mounted on
/dev/dsk/c0t5d0s0    1525743   15729 1448985     2%    /
/dev/dsk/c0t5d0s5    4130454  388770 3700380    10%    /usr
/proc                      0       0       0     0%    /proc
fd                         0       0       0     0%    /dev/fd
/dev/dsk/c0t5d0s3    57134990 210335 56353306    1%    /var
/dev/dsk/c0t5d0s4    8260925    8967 8169349     1%    /opt
/dev/dsk/c0t5d0s6    16518579      9 16353385    1%    /usr/local
swap                 2128632       8 2128624     1%    /tmp
#
So that’s all for this episode – I now have a SPARCclassic running Solaris 2.6 using a disk-layout suitable for both an SSD *and* a PrestoServe accelerator.
The next part of this story will involve a visit to SunSolve, circa 2005…
So what exactly is PrestoServe? It is a hardware accelerator, sort-of. I’m sorry, but we’ll need to dig into a bit of history here, to explain. If you would prefer to avoid my boredom-inducing reminiscent rambling, just look at the pictures instead.
Origin: The Problem With NFSv2
PrestoServe was born out the need to deal with a shortcoming in the original “NFS” (Network File System) protocol developed by Sun and published in 1986: NFSv2.
Unlike local filesystem writes that could be cached in RAM by the O/S, all NFSv2 writes are fully synchronous from the perspective of the invoking process, all the way to the server’s disk platters.
This was done so that, from the NFS client’s program/process perspective, everything was fully transparent, functionally behaving “just like” local writes.
In particular, during the running life of the client process, it doesn’t matter if the NFS server reboots or crashes, as long as it eventually comes back on-line. No writes are lost, and apart from the delay, the client process remains blissfully unaware that server went away then came back. For the simplistic NFSv2 protocol, this requires that every client write cannot be acknowledged until the server has explicitly committed the write to disk and waited for it to complete (and flushed any effectively-volatile drive cache, too).
However, this can impose quite a performance penalty compared to purely local writes:
a sequence of small writes cannot be coalesced into a single larger write, thus wasting the (larger) sequential disk-drive bandwidth.
a sequence of random writes cannot be reordered to take advantage of elevator-seeking.
successive writes to the same block of a file cannot be converted into a single write.
server-side overlapped-I/O (eg: SCSI tagged-command-queing) cannot be taken advantage of.
overlapped-I/O on the client-side cannot be taken advantage of for directory-creation/-deletion or file-creation/-deletion operations within the same directory.
That latter is especially painful in combination with the others: imagine unpacking a tar archive containing lots of small files, into an NFS-mounted directory; it could take eons.
Legato Systems
In 1988, Legato Systems designed and introduced a range of add-in battery-backed-RAM accelerator cards for various manufacturer’s NFS servers, to address the very-slow-writes problem. Instead of having to wait for the writes to be committed all the way to disk, they could be saved in the battery-backed RAM, and flushed to disk asynchronously after write-coalescing, also utilising elevator-seek and tagged-command-queuing optimisations.
Initially, PrestoServe hardware/software were sold as Legato Systems products, but in 1990, Legato signed licence agreements with Sun and DEC whereby those companies could sell the Legato PrestoServe hardware designs under their own branding, and with responsibility for porting the presto device-driver to future O/S versions via a source-code license. Similar arrangements with other server manufacturers followed.
In 1995 Sun published the NFSv3 specification, which (largely) addressed the slow-writes problem by introducing an explicit two-phase commit logic into the protocol, which vastly reduced the need for PrestoServe hardware acceleration.
Many vendors adopted NFSv3 quickly due to another reason: it’s support for large files (>2GiB); that relatively quick adoption of NFSv3 also caused the PrestoServe market to disappear rather more quickly than expected.
Solaris 2.5 (1995) was the last version of Solaris to include the “presto” device-driver bundled with the operating system. For later versions of Solaris, Sun’s PrestoServe software became an optional, unbundled product, available only by special order.
Why Use PrestoServe if you are not using NFSv2?
Interestingly, there still is a modern-day local use-case for PrestoServe: to protect SSDs on an SSD-unaware operating system.
Since PrestoServe performs off-drive caching of writes, it can help protect an SSD from both the wear and slight speed penalties caused by unaligned or excessive writes.
Of course, that benefit only applies to SSD-unaware operating systems. Thus SunOS 4.x, and Solaris 2.x, 7, 8 and 9 could well gain some benefit from PrestoServe when SSDs are involved.
PrestoServe Hardware Form-Factors
The various versions of PrestoServe add-in hardware were of course, system-specific (or more precisely: bus-specific). Over the years, there have been:
1MB VME card for Sun SPARCsystem-300 series, SPARCsystem-400 series, and some Sun-3 models.
Sun 370-1401: 1MiB NVRAM SBus card for Sun SPARCserver 600 series, SPARCstation, Ultra-1 and Ultra-2 systems.
Sun 501-2001: 2MiB NVSIMM for the special wide RAM slots on the SPARCstation-10 and SPARCstation-20.
Sun 501-2197 4MiB NVSIMM for the Sun SPARCserver-1000 and SPARCserver-2000.
DEC TurboChannel NVRAM module for DECsystem 5000-series servers.
DEC MS7BB NVRAM module for DEC 7000/AXP and 10000/AXP servers.
DEC NVRAM module for some VAX-6000 models.
IBM NVRAM module for RS6000/500 server.
probably many others too.
Sun 370-1401 (SBus PrestoServe)
Sun 501-2001 (SPARCstation-10/SPARCstation-20 NVSIMM PrestoServe)
Batteries
The rechargable batteries on the Sun NVRAM-SIMMs and on the SBus card are not “user replaceable”: they are soldered-in. The batteries normally recharge during system use, but when they finally fully die (cannot be recharged due to age), you are supposed to throw the whole NVRAM card away and buy a new one. Unfortunately, new ones have not been available for over 20 years, so if the batteries are shot I might need to perform a hardcore battery-transplant.
Magic Incantation Two – PrestoServe-friendly disk partitioning
The Solaris installer, if you let it, performs a guessed default partitioning of the target disk, allocating one partition for each of / (root), swap and /usr, and offers to use any remaining space for /export. Also, it allocates sizes for the former that are only sufficient for early-90s small-system use typical for a smaller-than-1GB disk drive. This default partitioning is usually quite unsuitable, even for a pre-2000s rotating-rust HDD with no PrestoServe.
First of all, with 100GB available, I am going to want somewhat larger sizes. Secondly, PrestoServe cannot be used to accelerate/cover the root filesystem itself, as that is where the presto driver loads from – to get maximum presto-assisted coverage, we want to split off some parts of the root filesystem into their own dedicated partitions. /var is an obvious choice, as it is one of the more write-intensive parts of Solaris.
/opt is used for “unbundled” Sun application software, and can be mounted read-only; any filesystems we can mount read-only could be a help to PrestoServe, as we can explicitly exclude those from presto caching, avoiding polluting the small NVRAM cache with data that is read (and cached in main memory) but never written.
By design, the stock Solaris /usr can also be mounted read-only, and thus should also be a separate partition.
Unfortunately, much third-party open-source software is packaged to run from /usr/local and requires write-access within /usr/local at runtime. To be able to mount /usr read-only, /usr/local will have to be split off into a separate partition.
Next, to allow for possible future installation of the Solaris logical volume manager (software RAID subsystem), aka “DiskSuite”, I am going to allocate an unformatted 16MB partition which could be used to store the initial 3 metadevice state-databases required by DiskSuite.
Finally, to avoid any risk of colliding with the critical disk-label (in the first sector of the drive) that I worked so hard to make SSD-friendly, and to absolutely ensure that all usable partitions are 4MB-aligned, we will skip the first logical cylinder of the disk entirely.
Due to the stupidity of the Solaris installer, the only way to pull off the trick of avoiding the first cylinder entirely, is to pre-partition the drive before running the installer, and then asking the installer to “use the existing partition table” via the F4 option in the installer’s partitioning screen.
Pre-Partitioning the Drive
From the firmware monitor “ok” prompt, boot the Solaris Install CDROM into single-user mode, then from the root shell prompt launch the format program, enter the partition command, and partition the drive as outlined above (user-input is highlighted):
ok boot cdrom -srw
Initializing Memory
Boot device: /iommu/sbus/espdma@4,8400000/esp@4,8800000/sd@6,0:d   File and args: -srw
SunOS Release 5.6 Version Generic_105181-05 [UNIX(R) System V Release 4.0]
Copyright (c) 1983-1997, Sun Microsystems, Inc.
Configuring devices...
INIT: SINGLE USER MODE
# format
Searching for disks...done

AVAILABLE DISK SELECTIONS:
    0. c0t5d0  <128GB SSD with 18% O/P cyl 25598 alt 2 hd 64 sec 128> /iommu@0,10000000/sbus@0,10001000/espdma@4,8400000/esp@4,8800000/sd@5,0
Specify disk (enter its number): 0
selecting c0t5d0
[disk formatted]

FORMAT MENU:
        disk       - select a disk
        type       - select (define) a disk type
        partition  - select (define) a partition table
        current    - describe the current disk
        format     - format and analyze the disk
        repair     - repair a defective sector
        label      - write label to the disk
        analyze    - surface analysis
        defect     - defect list management
        backup     - search for backup labels
        verify     - read and display labels
        save       - save new disk/partition definitions
        inquiry    - show vendor, product and revision
        volname    - set 8-character volume name
        !     - execute , then return
        quit
format> partition

PARTITION MENU:
        0      - change `0' partition
        1      - change `1' partition
        2      - change `2' partition
        3      - change `3' partition
        4      - change `4' partition
        5      - change `5' partition
        6      - change `6' partition
        7      - change `7' partition
        select - select a predefined table
        modify - modify a predefined partition table
        name   - name the current table
        print  - display the current table
        label  - write partition map and label to the disk
        ! - execute , then return
        quit
partition> 2
Part      Tag    Flag     Cylinders         Size            Blocks
  2     backup    wu       0 - 25597       99.99GB    (25598/0/0) 209698816

Enter partition id tag[backup]: backup
Enter partition permission flags[wu]: wu
Enter new starting cyl[0]: 0
Enter partition size[209698816b, 25598c, 102392.00mb, 99.99gb]: 25598c
partition> 7
Part      Tag    Flag     Cylinders         Size            Blocks
  7 unassigned    wm       0                0         (0/0/0)             0

Enter partition id tag[unassigned]: stand
Enter partition permission flags[wm]: wu
Enter new starting cyl[0]: 1
Enter partition size[0b, 0c, 0.00mb, 0.00gb]: 4c
partition> 0
Part      Tag    Flag     Cylinders         Size            Blocks
  0       root    wm       0 -    31      128.00MB    (32/0/0)       262144

Enter partition id tag[root]: root
Enter partition permission flags[wm]: wm
Enter new starting cyl[0]: 5
Enter partition size[262144b, 32c, 128.00mb, 0.12gb]: 384c
partition> 1
Part      Tag    Flag     Cylinders         Size            Blocks
  1       swap    wu      32 -    63      128.00MB    (32/0/0)       262144

Enter partition id tag[swap]: swap
Enter partition permission flags[wu]: wu
Enter new starting cyl[32]: 389
Enter partition size[262144b, 32c, 128.00mb, 0.12gb]: 3877c
partition> 3
Part      Tag    Flag     Cylinders         Size            Blocks
  3 unassigned    wm       0                0         (0/0/0)             0

Enter partition id tag[unassigned]: var
Enter partition permission flags[wm]: wm
Enter new starting cyl[0]: 4266
Enter partition size[0b, 0c, 0.00mb, 0.00gb]: 14164c
partition> 4
Part      Tag    Flag     Cylinders         Size            Blocks
  4 unassigned    wm       0                0         (0/0/0)             0

Enter partition id tag[unassigned]: alternates
Enter partition permission flags[wm]: wm
Enter new starting cyl[0]: 18430
Enter partition size[0b, 0c, 0.00mb, 0.00gb]: 2048c
partition> 5
Part      Tag    Flag     Cylinders         Size            Blocks
  5 unassigned    wm       0                0         (0/0/0)             0

Enter partition id tag[unassigned]: usr
Enter partition permission flags[wm]: wm
Enter new starting cyl[0]: 20478
Enter partition size[0b, 0c, 0.00mb, 0.00gb]: 1024c
partition> 6
Part      Tag    Flag     Cylinders         Size            Blocks
  6        usr    wm      64 - 25597       99.74GB    (25534/0/0) 209174528

Enter partition id tag[usr]: alternates
Enter partition permission flags[wm]: wm
Enter new starting cyl[64]: 21502
Enter partition size[33554432b, 4096c, 16384.00mb, 16.00gb]: 4096c
partition> print
Current partition table (unnamed):
Total disk cylinders available: 25598 + 2 (reserved cylinders)

Part      Tag    Flag     Cylinders         Size            Blocks
  0       root    wm       5 -   388        1.50GB    (384/0/0)     3145728
  1       swap    wu     389 -  4265       15.14GB    (3877/0/0)   31760384
  2     backup    wu       0 - 25597       99.99GB    (25598/0/0) 209698816
  3        var    wm    4266 - 18429       55.33GB    (14164/0/0) 116031488
  4 alternates    wm   18430 - 20477        8.00GB    (2048/0/0)   16777216
  5        usr    wm   20478 - 21501        4.00GB    (1024/0/0)    8388608
  6 alternates    wm   21502 - 25597       16.00GB    (4096/0/0)   33554432
  7      stand    wu       0 -     3       16.00MB    (4/0/0)         32768

partition> label
Ready to label disk, continue? y

partition> quit

FORMAT MENU:
        disk       - select a disk
        type       - select (define) a disk type
        partition  - select (define) a partition table
        current    - describe the current disk
        format     - format and analyze the disk
        repair     - repair a defective sector
        label      - write label to the disk
        analyze    - surface analysis
        defect     - defect list management
        backup     - search for backup labels
        verify     - read and display labels
        save       - save new disk/partition definitions
        inquiry    - show vendor, product and revision
        volname    - set 8-character volume name
        !     - execute , then return
        quit
format> quit
#
# init 0

INIT: New run level: 0
The system is coming down.  Please wait.
System services are now being stopped.
umount: /dev busy
umount: /cdrom busy
The system is down.
syncing file systems... done
Program terminated
ok
The next step will be to install Solaris using a special trick to make it re-use the existing SSD-friendly and PrestoServe-friendly partion-table that has been so carefully pre-constructed…
Given a 10 MB/sec old-school fast-narrow SCSI storage interface and a 3.5″ drive-bay, how about adding a 500/400 MB/sec SATA solid-state 2.5″ drive?
Samsung PM851 SSD
Samsung PM851 SSD
It’s not as wonky an idea as it sounds, as I am chasing some specific benefits:
Much lower power-draw than a 3.5″ four-platter rotating-rust drive; anything that reduces the current-draw on a 30-year-old PSU has got to be a good thing, and this swap will make a huge difference.
Lower-latency average access; even going through a bridge chip that might add a few milliseconds, with a constant sub-millisecond drive on the other side, this will still be very much quicker than an old HDD.
With the right incantations, which we will cover later, an SSD will survive much longer than an HDD, and I’m in this for the very long haul.
IDE on SCSI
Although historically there have been IDE-SCSI adaptors, including carriers for laptop IDE HDDs, the last 20 years of experience is pushing me away from that route. Almost all native-IDE solid-state drives are RAMless, ie: suffer dreadfully from stuttering performance, occasional 30-second I/O delays, and so on. I know, I’ve tried many over the years.
Even though you can also get 2.5″ IDE carriers for mSATA solid-state drives (I have one in my 1st-generation G4 mac mini), the general IDE interface isn’t anything like as efficient as SATA; and the other (older) IDE adaptor options are either too large or too slow.
In particular:
The old Addonics’ laptop-IDE-to-50-pin-SCSI carrier-adaptors were dreadfully slow: even with the fastest of laptop HDDs (7200rpm with 16MB cache), you would be lucky to get as much as 160 KB/sec through the adaptor, even for sequential I/O. Yes, KB, not MB!!!
The Yamaha V769970 40-pin-IDE-to-50-pin-Fast-Narrow-SCSI bridge-board is super-high performance: you can, with the right drive, get 9.8 MB/sec, sustained, through it. The drawback is that it is intended for a 5.25″ drive and thus cannot be made to fit in the SPARCclassic.
SATA on SCSI
Of course, I’m going to need special equipment to be able to interface an SATA drive to a 50-pin SCSI bus, and it just so happens that I have the necessary: an ACARD ARS2000SUP. These have been popular upgrades in both SCSI-based industrial embedded systems and SCSI MIDI samplers, given that replacement *new* 50-pin SCSI HDDs are difficult to get hold of nowadays and are prone to rather limited lifetimes.
A couple of years back, I was lucky to be able to pick up two ARS2000SUP units for £100 total (stock retail price was much higher), from a consultant who supplies parts for maintenance of industrial control systems and had just had a customer change their order at the last minute: he was left with leftover parts he couldn’t easily shift, so was happy to heavily discount them at that moment.
Solid State Drive
For 1990’s Solaris (Solaris 2.6 in particular), we cannot realistically go beyond 256GB per drive: although the Solaris UFS filesystem can cope with 1TB volumes, the low-level disk-partitioning scheme cannot (quite) reach 256GB. Besides, on a SPARCclassic, such huge volumes would be more trouble than they are worth (how would you like to back that up over a 10 MB/sec interface?).
As it happens, I have a 120GB Samsung PM851 left over from another project, which should do nicely. We are only going to be able to run it at 1/50th of it’s maximum throughput, but as I noted before, I’m especially after the better latency and it will provide more actual throughput than an HDD such as the existing Seagate ST34572N (4GB Barracuda 4XL).
Aside: as originally specced, the SPARCclassic came with a 207 MB Connor HDD – we’re looking at approximately 500 times more capacity here!
Assembly
This is so simple that it’s easier to tell it with pictures:
After asssembly, the unit is mounted in the host system just like a regular 3.5″ HDD.
Incantation One – Sun-labelling an SSD
Solaris will install and run on this combination “as-is”, with no special measures needed. However, prior to Solaris 10, some additional considerations for SSDs were not really catered for.
In particular, the Solaris partitioning scheme still relied on notional heads/cylinders/sectors geometries, even though the Solaris SCSI driver performs all disk-sector addressing as linear LBA (it has to, that what the SCSI command-set does). What actually happens is that the Solaris UFS filesystem uses the implied geometry to optimise a few operations (it tries to do full-cylinder reads when it detects a small-block sequential access pattern is being used, and so on, and so on), even though such optimisations haven’t made a whole lot of sense since the mid-90’s when ZBR HDDs became very commonplace.
There is also the issue that on an HDD, there is no write-amplification problem (and even if there were, it wouldn’t harm the drive). But on an SSD, avoiding small I/Os reduces wear on the drive, but it’s also unaligned writes that cause the damage: the UFS filesystem allocates in units of 8KB (with 1KB subblocks being available for trailer fragments, when needed), but if the implied 8KB writes are only 512-byte-aligned, then most of them will cause multiple internal flash erase/writes cycles on the drive. Severally-multiple in some cases (ie: it could be more than simply 2x).
Given that fixed C/H/S geometries haven’t been common since forever, how does Solaris handle SCSI mass storage? By writing a 1-sector “label” at the start of the first 16-sector reserved (“otherwise unused”) portion of the drive. The label specifies the “geometry” of the drive. All drives shipped by Sun were pre-labelled in this way. Handily, using the Solaris /sbin/format program, we can write a custom label on any SCSI HDD or SSD – and it allows you to interactively specify the geometric contents of that label .
So the method is to boot from the Solaris Install CDROM into single-user mode, then from the resulting root shell prompt, run the format command, select the target device (/dev/rdsk/c0t3d0s0 or whatever), DO NOT LET format TAKE A WILD GUESS AT A SUITABLE GEOMETRY: specify the disk as “Unknown”, then specify the geometry as follows:
The number of physical cylinders should be chosen so that the resultant total number of 512-byte sectors (cylinders * heads * sectors-per-track) is no more than the total capacity of the drive. For a consumer/non-enterprise SSD, it would be prudent to somewhat reduce the number of cylinders, to provide a degree of NAND overprovisioning. The above example with 25600 total cylinders (each of 4MB) gives approximately 18% overprovisioning on a 128GB drive.
To label the drive as above, from the firmware monitor prompt (user input is highlighted):
ok boot cdrom -srw
Initializing Memory:
Boot device: /iommu/sbus/espdma@4,8400000/esp@4,8800000/sd@6,0:d   File and args: -srw
SunOS Release 5.6 Version Generic_105181-05 [UNIX(R) System V Release 4.0]
Copyright (c) 1983-1997, Sun Microsystems, Inc.
Configuring devices...
INIT: SINGLE USER MODE
# format
Searching for disks...WARNING: /iommu@0,10000000/sbus@0,10001000/espdma@4,8400000/esp@4,8800000/sd@5,0 (sd5):
        corrupt label - wrong magic number

done

c0t5d0: configured with capacity of 119.23GB

AVAILABLE DISK SELECTIONS:
    0. c0t5d0 <ATA-SAMSUNGSSDPM85-114P cyl 30764 alt 2 hd 64 sec 127>
        /iommu@0,10000000/sbus@0,10001000/espdma@4,8400000/esp@4,8800000/sd@5,0
Specify disk (enter its number): 0
selecting c0t5d0
[disk formatted]
Disk not labeled.  Label it now? n

FORMAT MENU:
        disk       - select a disk
        type       - select (define) a disk type
        partition  - select (define) a partition table
        current    - describe the current disk
        format     - format and analyze the disk
        repair     - repair a defective sector
        label      - write label to the disk
        analyze    - surface analysis
        defect     - defect list management
        backup     - search for backup labels
        verify     - read and display labels
        save       - save new disk/partition definitions
        inquiry    - show vendor, product and revision
        volname    - set 8-character volume name
        !     - execute , then return
        quit
format> type

AVAILABLE DRIVE TYPES:
        0. Auto configure
        1. Quantum ProDrive 80S
        2. Quantum ProDrive 105S
        3. CDC Wren IV 94171-344
        4. SUN0104
        5. SUN0207
        6. SUN0327
        7. SUN0340
        8. SUN0424
        9. SUN0535
        10. SUN0669
        11. SUN1.0G
        12. SUN1.05
        13. SUN1.3G
        14. SUN2.1G
        15. SUN2.9G
        16. ATA-SAMSUNGSSDPM85-114P
        17. other
Specify disk type (enter its number)[16]: 17
Enter number of data cylinders: 25598
Enter number of alternate cylinders[2]: 2
Enter number of physical cylinders[25600]: 25600
Enter number of heads: 64
Enter physical number of heads[default]: 64
Enter number of data sectors/track: 128
Enter number of physical sectors/track[default]: 128
Enter rpm of drive[3600]: 20000
Enter format time[default]:
Enter cylinder skew[default]: 0
Enter track skew[default]: 0
Enter tracks per zone[default]: 25600
Enter alternate tracks[default]: 0
Enter alternate sectors[default]: 0
Enter cache control[default]:
Enter prefetch threshold[default]:
Enter minimum prefetch[default]:
Enter maximum prefetch[default]:
Enter disk type name (remember quotes): "128GB SSD with 18% O/P"
selecting c0t5d0
[disk formatted]
Disk not labeled.  Label it now? y
format> quit
# init 0

INIT: New run level: 0
The system is coming down.  Please wait.
System services are now being stopped.
umount: /dev busy
umount: /cdrom busy
The system is down.
syncing file systems... done
Program terminated
ok
At this point I’m almost ready to install Solaris onto the SSD, but in the next episode I’ll take a small diversion to explain what PrestoServe actually is, and why it will require a particular filesystem layout during the Solaris install.
As is all too common when playing with old SPARC systems, the inevitable wrinkle has emerged: the NVRAM built-in battery has expired, which makes booting the system, installing an O/S, and using it, rather tricky. The dead giveaway is the rubbish Ethernet MAC address and the “IDPROM contents are invalid” messages on the boot screen:
The NVRAM chip is a hybrid device: 8 Kbytes of byte-wide SRAM, with a built-in 32KHz oscillator, and an embedded battery. A few locations of that SRAM are dedicated to storing BCD-encoded date/time, automatically updated from the embedded oscillator (what the PC world would call the “RTC”).
The remainder of that SRAM is usable for system-configuration information, and Sun SPARC machines use a few bytes of that for storing (a) a machine-wide Ethernet MAC address, (b) a system serial-number, and (c) a “host-ID” which encodes the machine-type and a software-readable machine ID.
That latter was used for per-machine software licensing (eg: the horror that was FlexLM licensing), which fortunately is very much less common these days. The only FlexLM-based software I have these days is the old Sun Forte 6u2 C/Fortran/Pascal compilers, and we won’t be using that here.
The SPARCclassic (and all “sun4m” machines) use a M48T08 chip, typically rated for 100ns or 150ns access-time. On the SPARCclassic, it is located next to the speaker cable on the motherboard, the tall DIP28 chip in a plastic carrier, with a yellow barcode sticker.
NVRAM/Timekeeper with yellow barcode
Unfortunately, these Timekeeper/NVRAM chips are only available as “new old stock”, and if those have ever been “initialised” (the oscillator started) then the batteries of those will probably be dead too, now.
I have ordered a couple of of M48T08 chips still in their original packaging (ie: not repackaged), but those will not arrive until Friday, and I cannot wait that long before proceding.
A Crazy Idea?
However, I do have a few brand new M48T59Y chips, also DIP28. These were used by Sun in the (younger) UltraSPARC-based “sun4u” machines such as the Ultra-1/-2/-5/-10/-30/-60/-80 workstations and the Ultra-Enterprise-X000 servers.
A careful reading of the M48T08 and M48T59Y datasheets shows that the only obvious difference is that the M48T08 is a 5V 8KB device, whereas the M48T59Y is a 3.3V 8KB device with 5V-tolerant I/O pins. The address-range used for the BCD-encoded automatic date/time storage is the same, I can hope that the actual byte-layout is too…? Note: the M48T59V is wholly 3.3V-only, so we cannot use those.
As far as I am aware, nobody has ever tried using an M48T59Y in a sun4m-class machine. Let’s try it! We have to remove the speaker, to get access to the socket, but apart from that, from a physical perspective, it’s just plug and play.
M48T59Y installed
Initialising the Chip
A brand new NVRAM/Timekeeper chip needs to be programmed with suitable system MAC address and host-ID, otherwise booting the system will still complain, and the O/S will refuse to subsequently program the date/time. Although it might be nice to still be in 1986, having the system time that far off causes it’s own problems for the O/S.
The instructions for initialising the chip are detailed in the FAQ; this needs to be done from the ROM monitor prompt, and then checked by switching the computer off and then on again, to see if it has remembered the programmed settings (MAC address and host-ID).
programming
after re-powering
wering. Although it does spit a single error-message about some other location in the SRAM, that doesn’t mess-up booting or operation like a dead battery does.
We are good to go, this will certainly tide me over until the real M48T08 chips arrive.
This post is an introduction to the SPARCclassic hardware. It is a slightly idiosyncratic computer, even by Sun standards.
Getting Inside
Removing the single lock-block screw at the rear of the chassis, allows the case to split into two pieces: the “top” containing the PSU plus drive-bays, and the “bottom” containing the PCBs.
Motherboard and I/O-Port board
Somewhat atypically, the rear ports on the system are not mounted on the motherboard, but rather on a separate rear I/O-Port board, which the main motherboard plugs into via a very wide edge-connector. The I/O-Port PCB is integral to the chassis (cannot be removed), but the motherboard can be removed.
This unusual arrangement was so that the exact same chassis could be used for both the SPARCclassic and the SPARCstation-LX – which had different motherboards but could plug into the same rear I/O-Port board. To separate the motherboard from the I/O-port PCB, there is large plastic “eject” lever that pokes up through a hole in the motherboard.
motherboard
ejecting
ejected
port-I/O board (non-removable)
External I/O Sockets
a DB25 socket providing a pair of RS-232 serial ports. Although 2 serial ports in a single DB25 socket might seem strange to PC afficionados, it is common on late-80s and early-90s Sun and compatible systems, and also some from other manufacturers.
a mini-DIN8 socket for connection of an external Sun keyboard+mouse combination.
3.5mm analogue audio jacks, one for input, the other for output.
an HD50 fast-narrow-SCSI socket.
an HD26 socket that is described in detail below.
a 13w3 analogue video connector for an external graphics screen.
a DB25 parallel-port.
an RJ45 10BaseT Ethernet socket.
a couple of hidden other sockets, discussed below.
HD26
The SPARCstation-LX used the rear HD26 socket for 16-bit digital audio, to connect to an external Sun speakerbox; when the speakerbox is plugged in, the in-chassis analogue speaker is disabled. On the other hand, the SPARCclassic used the traditional separate analogue audio-in and audio-out jacks to support an 8-bit external audio capability.
But that’s not all: that very same HD26 socket also contains an Ethernet AUI (10Base2 attachment-unit interface) channel – if you plugged a special Sun-specific HD26-to-15-pin-AUI cable into that port, you could use an external transceiver to attach to a coax 10Base2 Ethernet.
And, of course, there was an optional external HD26-splitter cable that converted the single HD26 socket on the back panel into a pair of HD26 sockets – one for the speakerbox, the other for the AUI.
Although I have a couple of speakerboxes, these cannot be used on the SPARCclassic, due to the lack of on-board 16-bit digital audio on the motherboard.
10BaseT Ethernet
As well as the abovementioned AUI interface, the SPARCclassic provides on-board 10 Mbits/sec twisted-pair Ethernet via a rear RJ45 10BaseT socket. Again, a 100 Mbit/sec SBus card could be added, but there is no way a 50MHz microSPARC could take much advantage of that (for their Fast Ethernet SBus cards, Sun recommend a minimum of a 60MHz SuperSPARC with 1MB L2 cache).
The Hidden Sockets
The SPARCstation-LX also had built-in ISDN network connectivity, via a pair of ISDN TE sockets on the rear panel next to the 10BaseT socket. The SPARCclassic motherboard does not have ISDN capability due to not having a DBRI interface chip, so Sun covered those rear ISDN sockets with a stick-on piece of beige plastic, presumably to prevent customers complaining that “the ISDN sockets don’t work”!
The microSPARC CPU was not originally intended for use in a computer/workstation – it was intended for embedded systems use such as in PABX switching systems, RAID controllers, automotive system controllers, very early set-top boxes, that kind of thing. However, in 1991, Sun was getting delayed with development of the general-purpose SuperSPARC workstation/server CPU, and expected pricing of same based on die-yields indicated that SuperSPARC wasn’t going to be economically viable for lower-end workstations. Sun thus needed to a quick-and-cheap-to-deploy alternative to tide them over in the entry-level workstation market. Thus the relatively-low-performance microSPARC was pushed into service in the SPARCclassic and SPARCstation-LX.
Quite apart from the simple in-order CPU pipeline, the microSPARC has a rather more significant performance problem: drastically undersize caches for running Solaris or SunOS, or indeed any other desktop operating system. Merely 4KB instruction-cache and 2KB data-cache, when workstation competitors were often 8KB+8KB L1 backed by an additional external L2 cache. On the plus side, in spite of it’s diminutive size, microSPARC included on-chip MMU, IOMMU, SBus controller and FPM-DRAM memory-controller, thus making the board level design much simpler and cheaper – ideal for a Sun “lunchbox” type enclosure. It really was the small low-cost option, all around.
The good news is that with the MMU, IOMMU and memory-controller on-chip rather than external, access-latency to main memory is low, which is a good thing considering how frequently main memory will be accessed due to the tiny on-chip caches.
Another quirk of the microSPARC is that the on-chip FPU is not a Sun, TI or Weitek design, but rather was a design licensed from Meiko Scientific, and turned out to be rather more efficient than earlier designs.
So where is the CPU hiding? There are several large clearly-visible ICs on the motherboard, but the tiny microSPARC CPU is hiding under the built-in mini-speaker, under it’s own plastic shroud:
We are going to have to be rather patient when using this machine, it really is rather slow. At 50MHz the SPARCclassic is, with a following wind, roughly equivalent in interactive feel to a previous-generation 40MHz SPARCstation-2. Let’s see what we can get out of it!
Internal Mass Storage
The internal drive-bays are located in the top segment of the chassis, next to the PSU:
upper: 3.5″ SCSI HDD; lower: 3.5″ diskette drive.
The on-board mass-storage systems are (a) 50-pin fast-narrow-SCSI (10 MBytes/sec) and (b) traditional NEC/Sony-compatible diskette interface; each connected via a ribbon-cable to one of the drive bays.
The on-board SCSI is also routed to an HD50 connector on the rear panel, for connecting external SCSI devices such as a CDROM drive, external disk-pack or SCSI document-scanner.
Of course, you could add an SBus card to provide an alternate/additional storage interface, eg: a SunSwift card (fast-wide-SCSI 20 MBytes/sec) or even a Sun Fibre-Channel interface card, although the microSPARC CPU would have difficulty taking much advantage of the extra bandwidth in either case.
Main Memory
The SPARCclassic has six 72-pin SIMM slots (yes: six, not a traditional power-of-two such as four or eight slots), which take 4MB or 16MB 70ns FPM modules with parity. ECC modules are not supported, nor are EDO modules.
The official maximum RAM capacity is 96MB, but there is a way of getting more in there, which will be discussed in a later episode.
Although too late for the October 2021 Retrochallenge, I have a little retrocomputing project to do that involves a new use for an old slightly unusual accelerator for old SBus-based computers.
The idea is to install a PrestoServe accelerator card, and make use of it, but not in the way it was originally intended for. This will be slightly tricky, as I do not have Solaris drivers for the accelerator card, but I do know of a slightly unusual way of finding/constructing them, via historic official patches for Sun Solaris – if I can find the CD’s, where did I stash them?.
The target system for this project is the lowest of the low, a Sun SPARCclassic, shown here with a CDROM case for scale:
Sun SPARCclassic
It’s a cute little thing, isn’t it? [Aside: Yes, Mark, this computer did come from where you thought!]
Project Outline
Describe some of the hardware wierdnesses of the SPARCclassic.
Install the actual maximum amount of RAM this thing can take, which involves a bit of deviousness.
Swap the internal rotating-rust SCSI HDD for an internal SSD (yes, really!).
Install Solaris 2.6 from CDROM, using an external SCSI CDROM drive.
Describe what the heck PrestoServe is, what it was originally for, and why it might still be useful even after the original use for such a thing has long since passed.
Install a PrestoServe accelerator SBus card, and hoping that the battery on it is still good after all the years.
Obtain the core PrestoServe binary device-driver by devious methods, and write the missing bits myself.
Run a few tests to see whether and how this combination works.
The First Snag
As always with my retrocomputing projects, demons have struck almost before starting. I was planning to use a laptop computer running Minicom as a serial-console for the SPARCclassic, but that requires an old laptop with a *real* serial-port – most of the modern USB-serial adaptors don’t provide all the needed handshake/flow-control signals.
Unfortunately my go-to laptop-with-real-serial-port (an HP OmniBook 500, Pentium-III) itself has a hardware problem – the LCD screen is slightly but especially annoyingly broken, as you can see:
HP OmniBook 500
That bright red vertical line of failed pixels is right in my eye-line, darn.
I have already tried ye olde traditional attempted fix – making sure the LCD panel signal-connectors are fully plugged in, and wiggling them to make sure, and pressing down on the flat-flex cable. No joy, so first job is to replace that LCD with a new one. Project hardly started and I’m visiting eBay already! I had better get a new roll of kapton tape whilst I’m about it, to refix the flat-flex cable onto the new LCD.
Here it is – a solid 12.1 inches of pure XGA goodness:
Replacement wasn’t too tricky, for a laptop computer. Of course, a soft-plastic spudger and a miniature Phillips screwdriver is needed. Also, it is extremely wise to test it *before* screwing it all back together and reclipping the plastics back in place!
That’s a result, I can now get back to the actual project!
With RetroChallenge2019/03 approaching rapidly, I have been trying to pick a project I could enter for the challenge – something to do with old computer tech, and something that I should be able to complete in 1 month.
A No-Fly Zone
Late last year, I purchased a 1975 SWTPC-6800 8-bit computer kit (including 2K RAM in the form of 16 individual 1-bit-wide 1Kbit SRAM chips!). However, the kit had previously been stored undisturbed in a basement for several decades, and a lot of the ICs have gone seriously rusty (packing-sponge-induced-rust disease). There is also one SRAM chip completely missing, and I have probably left it too late to be hunting for replacement 2102 SRAM chips in time for the start of RetroChallenge in less than 1 days’ time. Also, given the sheer amount of soldering required, not to mention replacement/repair of logic chips and possibly even the 6800 CPU itself, 1 month would not be sufficient time to get this all done and have something working to show at the end of it. I guess this one is really a longer-term project.
An Old New Hope
However, I do have a suitable 1-month other project that fits the bill: to show and document exactly how and why to perform the somewhat devious ultimate-upgrades for a particular excruciatingly low-end odd-ball early-90s classic computer, one that few will be familiar with. A computer model that is officially named ‘classic’ in fact: No, it’s not a Mac Classic, but the rather weak Sun SPARCclassic.
I’ll also be discussing the history of the model, the UK-delivery delay and the proposed trip to Scotland, how the SPARCclassic came to have the CPU it does (and why it wasn’t an ideal choice), why it’s name was a bit of a misnomer at the time, the slightly odd-ball RAM organisation and how to overcome it, a couple of ridiculously over-the-top upgrades, the “official Sun doorstop” incident, where to find some of the now lost-in-history device-driver software, the annoyances with the chassis case, and other fascinatingly boring details that would otherwise be lost in the mists of time. And lots of pictures! I can feel another HotJava screenshot coming on…
This project is going to tax my writing and composition capabilities – there’s just so much to say and show (never mind the accompanying actual doing). Organising it all succinctly enough is going to be difficult, but worth doing for one of the more oddball Sun models, which is saying quite something!
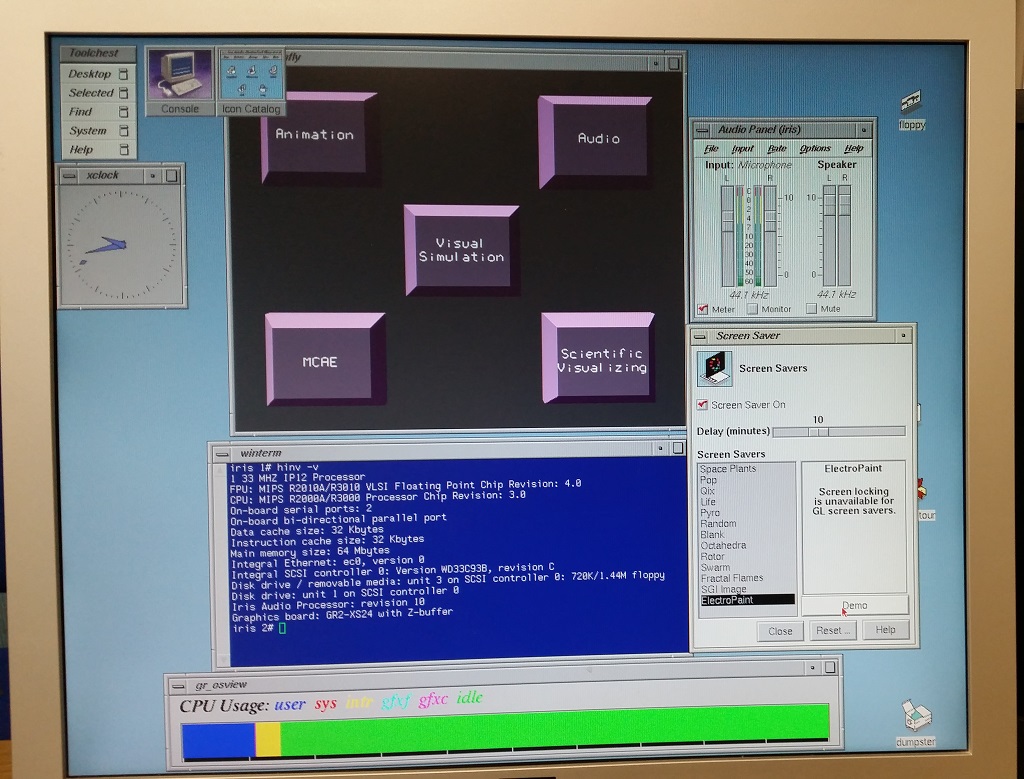
For those of you wondering what happened to that SGI Iris Indigo R3000, after my failed PSU repair…
I purchased a replacement PSU from the magnificent Mr. Mapleson (patently the World’s foremost afficionado-and-vendor of historic SGI kit), and he chucked-in a complimentary 73Gb fast-narrow-SCSI drive on an SGI sled.
Together with an SGI 24-bit 3D graphics card (XS24-Z) that I obtained from Hungary, I had a full extra year of Indigo fun, and rediscovered what a wonderfully capable machine the 33MHz R3000 Indigo is – as can be seen in my subsequent videos:
However, after that bonus year, I needed to make room in my small flat for a couple of newly-procured very old computers, and thus had to let the Indigo go. Although there was quite a bit of interest from America, that was too far to ship it. But, via a tertiary acquaintance-of-a-mailing-list-user, guess who found out I was looking for a good home for it… “Come on Down, Ian Mapleson!”
Thus, after entertaining me from 2001-2018, this 1991 SGI machine is now in the best home possible for this kind of thing, a place where it will be well-cared for. Happy ending!


 I purchased a replacement PSU from the magnificent